GPW 29668 Rebuild
I have owned GPW 29668 since 1980. This is very likely my sixth rebuild. However this time I mainly intend to concentrate on a few areas, including:
- Sand the body and frame for repainting – light surface rust and numerous drilled holes
- Rebuild the transmission – hard shifting
- Adjust valves
- Oil lines, nothing wrong with them now but they are old!
- Instrument gauges replace with better quality repros
- Clutch replacement, including Pressure plate, etc.
- Ford script to be brazed onto the tail
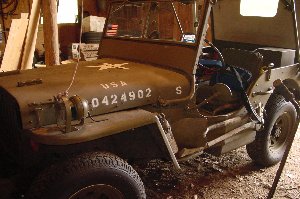
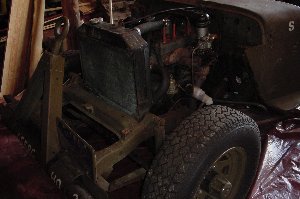
A view of the jeep after day 1 of disassembly. On this day I mostly removed the small bits, like the grab handles, top bow and brackets. What surprised me the most is how EASY the steering wheel came off. A couple of squirts of some easylube and a few whacks with a small hammer (with a board as a cushion) and off it came!
It was plain to me that I had made a wise decision in removing all of the body parts. As I did this I exposed trouble spots were there was either rust, dirt or cracked both (or a combination of all three!)
I had intended in removing the spare tire but I had left my keys in the Suburban. I am rebuilding the jeep in a friends barn and their bridge was damaged beyond use in a recent storm. So you have to walk a good little distance so the spare removal would have to wait until the next trip. Don’t get too excited about the Ford script that ‘s just me messing with computer art. Later my friend and I will braze the script into the body.
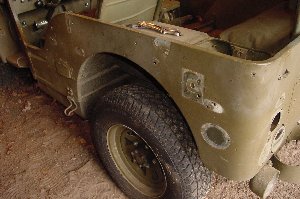
View of the passenger side showing brackets removed. You should have seen the dirt come out from behind the reflectors.
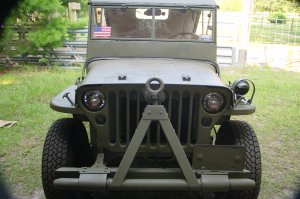
This was a busy day with the removal of the the front fenders, grill and windshield. I also further disassembled the windshield by removing the inner panel. Everything needs to be sanded and repainted.
Another view of the front left quarter.
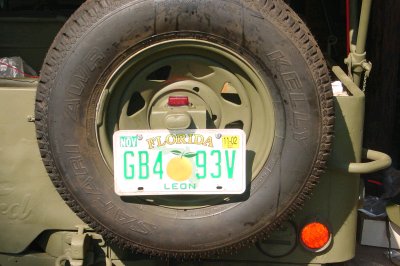
I remembered the key on this trip and removed the spare.
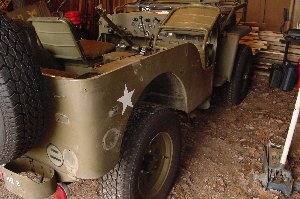
Mostly removed the remaining body bolts, seats and most of the gauges. Beginning to look pretty empty now
A view from the front. Civilian heater still installed. It was a life saver in Alaska but even here in ;”sunny;” Florida it is nice to have.
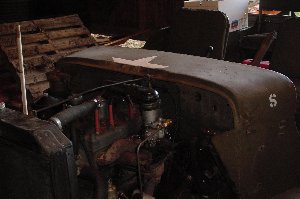
Here’s an odd hole exposed in the Filipino body. I’m not going to fill this hole, just prep the surface and bolt the cover back into place.
Here’s an update on my jeep. I skipped quite a lot of the in between. Taking the body to have it sandblasted after I gave up trying to scrape the rubber crap off the bottom of my jeep. Got two friends and my son to help me lift the body on the jeep. That was a lot better than when it was just me taking it off! While waiting for the body I rebuilt the tranny using all new gears purchased via the Internet from the Netherlands. I have also purchased a T-1 Air Compressor that I am very excited about installing as well as a NOS WW2 jeep heater. Just too cool. Because of the original heater I am deleting the non-original heater I had between the seats. It was installed for North Dakota and Alaska but believe it or not it actually gets a little cold here in Florida.
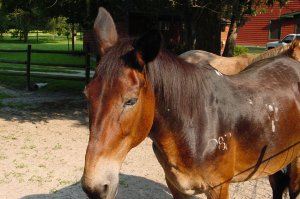
This is Chucker, a mule that “assists” me by providing jeep consultations along the fence line.
Pepper is the friendly one, she is quiet and unassuming.
The mules belong to Thomas and Barbie Phillips. Great friends of mine that have graciously let me use their barn, tools and anything else I have needed while working on my jeep. The barn has been a great place to work.
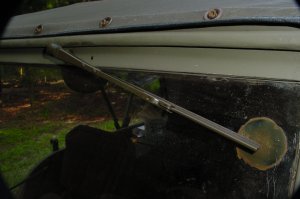
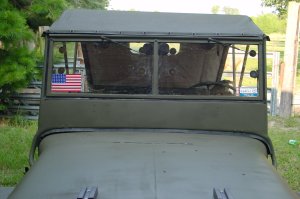
View of the vacuum wiper from the outside. The large black dots hold the defroster to the windshield.
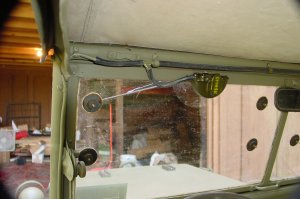
Inside view of the NOS Trico wipers and the piping that I cobbled together.
Close up of vacuum motor.
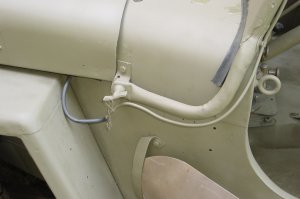
Tubing detail at outside of vehicle
Detail of the tubing that connects to the manifold. Used a compression fitting to simulate original connection.
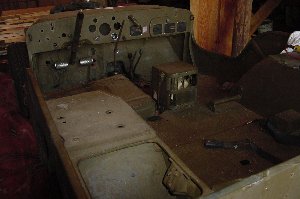
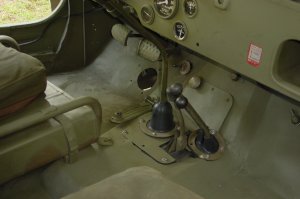
Shot of the steering wheel and dash. Still need to install the glovebox door and other assorted items.
Most of the work is now done. A lot of little details need to be completed, some you can spot in the photos below. A few are just things that in my opinion need to be added. For example, I will be adding a turn signal kit (it has always had one, just haven’t reinstalled it yet). This time around I am going to experiment with LEDs for the “extra” brake lights and turning indicators. I also plan on using quick connects so during parades or such they can be easily removed. I still need to design a license plate holder as I don’t want to attached it straight to the rear bumper as I have done before. The front is pretty sturdy at present but I am thinking of removing the original bumper and just leaving the tandem hitch in place (which is the way it should be installed).
No star yet. Wipers lock into position when off.
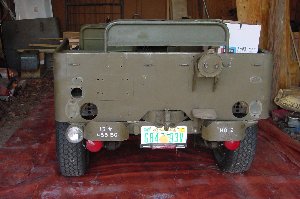
View of the front of my jeep with tandem hitch and extra bumper. Still deciding on removal of the “original” bumper.
Side view of my baby. Almost done. Minor items to go. Except for the T1 of course!
Shot of the new rubber on the tranny and tcase sticks. Just no helping the current fitting of the cover. It was cut to install the Warn overdrive.
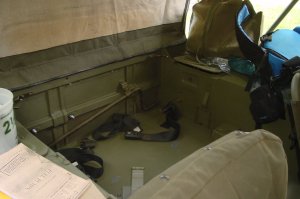
Inside rear detail. Still need to intall the rear seat,foot rests and of course my makeshift radio for my 40s tunes.
Short videos, not a long download:
Listen to that purr…well, it’s a purr to me.
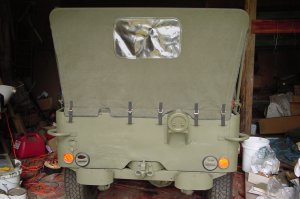
Shot of the rear with Ford script installed. Finally after all these years both the script and the rubber gasket around the lights.
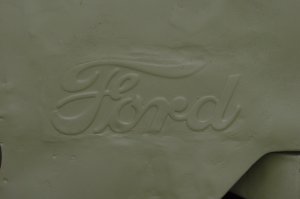
Closer view of the Ford Script. This was grafted to the Filipino jeep repro body. Donor was a GP!.
Close up of Ford Script mounted to jeep body. Other may have been able to do a better job. But after 20 years of not having the script, I am very happy with it!
This weekend was mostly eaten up by trying to get the T-1 Air compressor installed/running. It came with reproduction mounting brackets. I have found that they are off a little bit. At any rate, the belt that I bought was rubbing against the original belt. I enlarged the mounting holes in a nearly vain attempt at adding a space between the belts and to get the pulleys to align. All I managed to do was get about 1mm of space. At least it is not smoking! Note to self: Make sure belt does not touch the lower radiator hose as it will and did cut into the hose. Order replacement on Monday!
My friend added some tow safety chain brackets for me. I had him weld the brackets to the spacer brackets I created to mount the tandem hitch. That way no welds were made directly to my frame or original tandem parts. The mounting plate was also welded to a small plate bolted on tope of the spring pivot mounting point. The plates have a hole that will allow me to drop the hook from the safety chain into place
I also whipped up a license plate holder based on a drawing whipped up by Jon Rogers of JeepDraw. His basic drawing amounted to a 2×2 box channel, 5 inches wide. After making this I realized that US plates have mounting holes roughly 7 inches on center. So I modified the plate holder to include a plate holding bar and a brake LED on top.
Let’s start at the end. Here is the completed plate holder with plate installed. For now light and brake wire are run from the tool box (trailer plug wiring hookup) under the body and behind the tire and thru one of those awful spokes. Once I am able to put the original wheels back on I will likely drill a hole in the disk
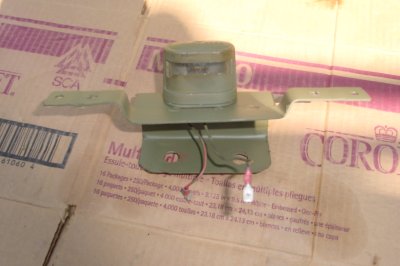
On top is the red brake light. It is actually a LED marker unit. I am experimenting with this design. I have always had extra lights on my jeep. I drive it any time of the day so lights are important. But I wanted to get a way from the huge extra lights I had previously mounted. The OD painted light fixture just underneath the LED is the light used to illuminate the plate at night. It is just a standard light carried at CarQuest and then painted OD. And of course the wide span of metal is were the plate actually attaches.
View of the plate holder from the bottom. You can see the U channel. This was made from 16 gauge scrap steel that a local steel merchant gave me. All I did was draw out what I wanted and then cut with a metal cutting Skilsaw. Bend it to suite in a vise. Of course for the long strip I had to get my friend to tack weld it into place.
The completed holder shown mounted without the plate. The holes are the same diameter as the studs. My 3/4 inch wrench fits inside the U easily and makes tightening the studs easy. To remove I simply unplug the wires, remove the two nuts from the studs and away we go.